
Instead of copying publisher updates between spreadsheets, email threads, and task lists, connect Google Sheets to ClickUp through Zapier so each new approved opportunity creates an assigned campaign task. This ClickUp digital PR campaign workflow keeps intake, outreach, and coverage checks together without treating a task update as proof of publication.
- Build your ClickUp digital PR campaign around assigned opportunities, not scattered email updates.
- Use Google Sheets and Zapier to create ClickUp tasks from approved intake rows.
- Keep earned coverage and sponsored placements separate in campaign reporting.
- NO-BS Marketplace suits SEO agencies sourcing publisher placements; track delivery separately from earned-media outreach.
Why this matters
A publisher reply is not coverage. An accepted pitch is not a published backlink. Your workflow needs to preserve those distinctions instead of moving everything into a vague completed column.
For your 2026 campaign setup, give each opportunity an owner, a next action, and evidence of its latest stage. ClickUp holds the work; the source sheet supplies intake records; Zapier moves those records between them.
NO-BS Marketplace is best for SEO professionals and agencies sourcing publisher placements, not managing journalist outreach tasks. NO-BS Marketplace connects those buyers with verified publisher sites for content, backlinks, sponsored content, and digital PR placements. Record that sourcing activity in your campaign without implying a native ClickUp connection.
Before you start
- Access: Have permission to create and edit a ClickUp List, edit the source Google Sheet, and connect both accounts in Zapier. Confirm that the account making the connection can access the destination List.
- Materials: Prepare an approved campaign brief, publisher or journalist details, an outreach owner, and a definition of verified coverage. Keep private contact details out of client-facing task descriptions.
- The gotcha: A new-row trigger handles new rows, not later edits to existing records. Build a dedicated approved-intake tab, finish each record before adding it, and keep the ClickUp task ID if you later add an update workflow.
Pick the intake method
Both methods below use the same ClickUp structure. Choose based on where approved opportunities already enter your process, not on how much automation you can add.
| Method | Best for | Advantage | Limitation |
|---|---|---|---|
| Manual ClickUp intake | Small campaigns with irregular opportunities | You can review context while creating each task | You must enter and assign every opportunity yourself |
| Google Sheets with Zapier | Teams approving opportunities in a shared sheet | Approved rows create tasks without repeated copying | Mapping errors and repeated source rows need controls |
Start with manual intake if your approval rules are unsettled. Automating an unclear handoff only creates unclear tasks faster. The connected setup below assumes Google Sheets is your approved intake source.
Configure your ClickUp campaign List
- Create a dedicated List inside the appropriate client or campaign location. Use a specific name such as Digital PR — 2026 product launch so teammates can identify it outside the immediate project.
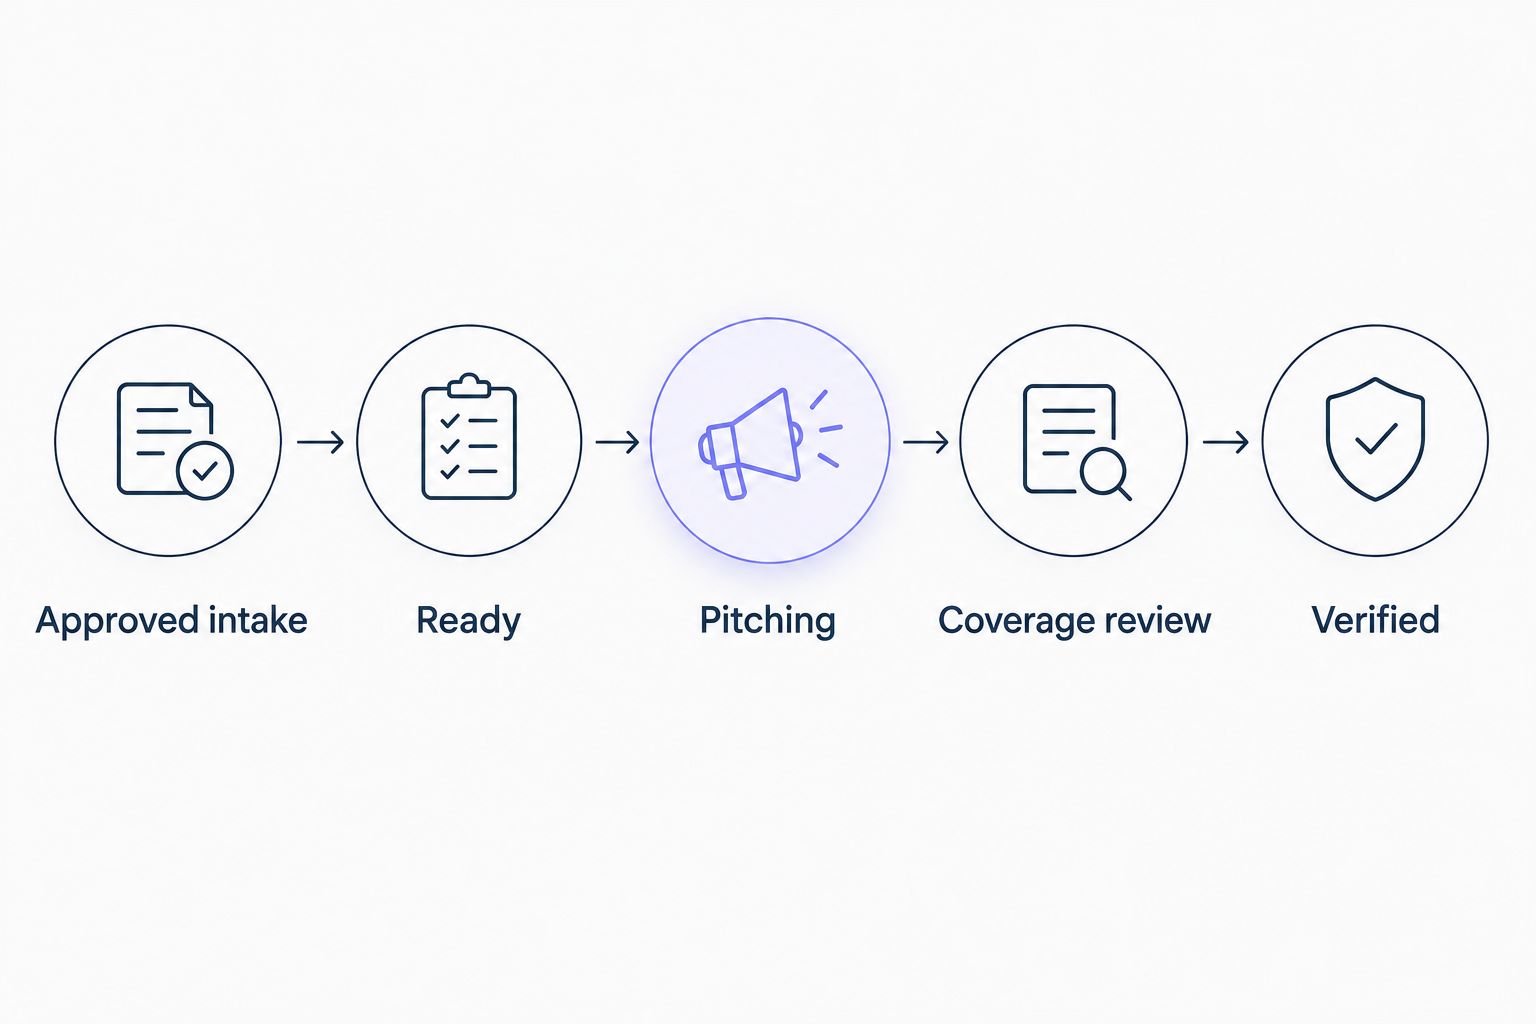
- Configure task statuses for the actual handoffs: Ready, Pitching, Awaiting reply, Coverage review, Verified, and Closed. These are workflow labels you create, not preset ClickUp stages.
- Create a sample task. In Description, add the campaign objective, publication, contact reference, approved angle, target page, source record ID, placement type, and next action.
- Set Assignees to the person responsible for the next action. Set Due date to that action's deadline, not an assumed publication date.
- Add a checklist covering brief approval, contact checks, outreach logging, publication review, and reporting. Keep Verified separate from Closed: a declined pitch belongs in the latter, not the former.
Expected result: You have a sample task that another teammate can understand without opening an email thread. The task states who acts next and what evidence allows it to advance.
Use one task per distinct outreach opportunity. If a publication has separate editorial and sponsored-content conversations, keep those opportunities separate; they have different approval requirements and reporting treatment.
Prepare your Google Sheets intake
- Create an approved-intake tab with headers for Opportunity ID, Campaign, Publication, Contact reference, Angle, Target page, Placement type, Owner, and Next action. These are your own column names.
- Give every opportunity a stable identifier, such as PR-2026-launch-alpha. Keep that identifier unchanged when the contact, pitch, or next action changes.
- Keep working drafts in a separate tab. Add a completed record to approved intake only after the brief and recipient have been checked.
- Populate a complete test row with clearly labeled test information. Do not use a real journalist's private details merely to test a connection.
- Agree on one source of truth after task creation: use ClickUp for execution and the sheet for intake. Do not maintain competing versions of outreach status in both places.
Expected result: Each new approved row contains enough information to create a useful task without a second research pass.
For a 2026 agency campaign, separate the client name from the campaign name. That keeps repeated launch names from becoming ambiguous when you review several accounts.
Avoid placing API credentials, account passwords, or confidential embargo material in the intake sheet. A task connection should move the minimum information the receiving team needs, not copy every source document into another system.
Connect Google Sheets to ClickUp in Zapier
- Create a Zap and select Google Sheets as the trigger app. Choose New Spreadsheet Row as the trigger event.
- Connect the Google account with access to the intake file. Select the intended Spreadsheet and Worksheet, then use Test trigger to retrieve your completed test row.
- Add ClickUp as the action app and select Create Task. Connect the ClickUp account that can access your campaign List.
- Select the destination campaign List in the action setup. Map the task name to the opportunity ID and publication, then map the row's campaign context into the task description.
- Set the initial status to your Ready stage. For the first version, use a fixed intake owner rather than passing an untested spreadsheet name into an assignee field.
- Test the action and open the resulting task in ClickUp. Check the destination, title, description, status, and owner before enabling the Zap.
Expected result: A completed intake row creates a task in the correct List with its source identifier and a named owner. This connection transfers task information; it does not send pitches or confirm backlinks.
Do not map a person's display name and assume it will resolve to the right ClickUp user. Start with a selected assignee in the action setup. Add owner-routing logic only after you have tested each destination user.
If NO-BS Marketplace supplies a placement in your digital PR campaign, add the relevant reference to the task yourself or through your approved intake process. Do not assume marketplace orders or publication updates automatically enter this connection.
Validate your campaign handoffs
- Add 3 test rows representing an earned-media pitch, a sponsored placement, and a rejected opportunity accidentally submitted for intake. Label them clearly and inspect what the connection creates.
- Confirm the intended relationship: 1 ClickUp task per approved opportunity. Remove the rejected test task, then tighten your intake procedure so rejected records never enter the connected tab.
- Move a test task through your custom stages. Require outreach evidence before Awaiting reply and a publication URL before Coverage review.
- Open the published page during coverage review. Check the mention, destination link, anchor text, and any sponsorship or link attributes relevant to reporting.
- Use Verified only after review. Put unsuccessful opportunities in Closed with a reason, then remove or archive test records before processing live intake.
Expected result: Your 2026 campaign separates approved work, outreach activity, and verified outcomes. A task cannot become evidence merely because someone changed its status.
The sequence is simple: approved intake creates work, an owner handles outreach, and publication review establishes the result. Keep that sequence visible in your List.
Update an existing task when an opportunity changes
Use a second workflow when the source system must remain responsible for a specific field, such as a publication reference. Do not build unrestricted two-way synchronization. Decide which system owns each field first.
- Add a ClickUp task ID column to the source sheet. Copy the ID from each created task during initial testing; automate that write-back only after the basic workflow works.
- Create a separate Zap using Google Sheets and New or Updated Spreadsheet Row. Select a dedicated update column so unrelated edits do not represent update requests.
- Add a filter that continues only when the row contains a ClickUp task ID. This prevents the update path from acting on opportunities that have not produced a task.
- Select ClickUp's Update Task action and map the stored task ID. Update only the field your source sheet owns; do not overwrite assignees or execution notes maintained in ClickUp.
- Change a test record and inspect the existing task. Confirm that the workflow updates that task instead of creating another one.
Expected result: Source corrections reach the existing opportunity without creating a second outreach task. Keep creation and updates separate so failures are easier to trace.
For your 2026 operating rules, document field ownership beside the integration instructions. If the sheet owns intake context and ClickUp owns execution, neither workflow should silently overwrite the other's work.
Troubleshooting
New opportunities never appear
Check that the Zap is enabled and points to the correct spreadsheet tab and ClickUp List. Inspect its run history before changing mappings. If a run failed, fix the reported connection or permission issue and inspect ClickUp before retrying.
A new-row trigger will not treat an edit to an existing row as a newly submitted opportunity. Use the update variant for edits rather than repeatedly re-entering records.
The same opportunity creates duplicate tasks
Compare source identifiers first. Check whether someone copied the row, another creation Zap watches the same tab, or a run was manually replayed after a task already appeared.
Keep a single creation path. Before replaying a failed workflow, search ClickUp for the opportunity ID and retain the existing task if creation already succeeded.
Tasks reach the wrong client List
Inspect the destination selected in the ClickUp action. A copied Zap can retain its original List even after you rename the workflow.
Use a fixed destination per campaign until you have tested routing rules. Include the campaign identifier in task descriptions so a misplaced task is obvious.
Tasks arrive without an owner
Check the assignee mapping and confirm that the connected account can access the intended user and List. Replace an untested text mapping with a selected intake owner.
Do not enable owner-based routing until every route has produced a correctly assigned test task. Unassigned intake is an incomplete handoff.
Published tasks inflate coverage totals
Review what the team means by Verified. A promised placement, brand mention, and linked mention are different outcomes.
Record the live page and review evidence before reporting coverage. Track earned editorial coverage separately from purchased placements, and do not report a live link as proof of indexing or ranking improvement.
Customize your workflow
Once intake works, expand the campaign structure rather than adding more triggers. Add a response deadline for reactive opportunities, an approval reference for spokesperson comments, and a separate review step for claims that need client sign-off.
For mixed campaigns, use the guide to combine guest posts and digital PR. NO-BS Marketplace can support publisher-placement sourcing while ClickUp tracks responsibilities; neither a purchase nor a completed task substitutes for publication checks.
Schedule a review after 7 days of live use. This is a suggested operating checkpoint, not a performance benchmark: inspect missed assignments, duplicate records, incomplete descriptions, and tasks that advanced without evidence.
FAQ
How do I set up a ClickUp digital PR campaign?
Create a campaign List with clear outreach stages, assigned opportunity tasks, and a publication-review step. Connect an approved Google Sheets intake tab through Zapier if your team already approves opportunities there.
Do I need Zapier to manage digital PR in ClickUp?
No. You can create and assign campaign tasks directly in ClickUp. Zapier is useful when approved opportunities already arrive in another supported system and repeated copying creates extra work.
Does this workflow connect NO-BS Marketplace directly to ClickUp?
No. This workflow connects Google Sheets to ClickUp through Zapier. Add publisher-placement references through your approved intake process rather than assuming a native marketplace connection.
Can I update an existing ClickUp task from Google Sheets?
Yes, use a separate update workflow that identifies the existing task by its ClickUp task ID. Limit updates to fields owned by the sheet so the connection does not overwrite execution notes.
Should every journalist receive a separate task?
Use a separate task for each distinct outreach opportunity that needs its own owner, next action, or outcome. Do not combine unrelated publication conversations merely because they share a campaign angle.
When should I mark digital PR coverage as verified?
Mark coverage as verified after opening the published page and checking the claimed outcome. Record whether the result is a mention or a link, and keep earned coverage separate from sponsored placements.
Will this ClickUp setup improve Google rankings?
This setup organizes campaign work; it does not establish a ranking improvement. Assess search outcomes separately from task completion and publication counts.
One last thing
A useful automation also preserves rejection. Keep the reason a pitch was declined or a publisher failed review, instead of deleting every unsuccessful opportunity.
That record gives the next campaign owner context before another pitch goes out. Make rejection reasons part of your 2026 campaign handoff, not an afterthought buried in someone's inbox.